


Now more than ever, protecting against email phishing attacks and other cybersecurity threats is crucial to every organization, especially when facing regulatory compliance measures.
So we've honed in on one important technique, DKIM, that helps protect employees, partners, and clients from potential email scams.
Here's what to know about DKIM, and why it's important.
What is the DKIM check?
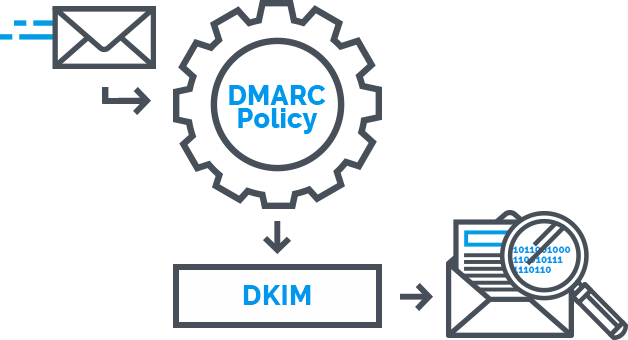
DKIM (DomainKeys Identified Mail) or the DKIM check is an email verification technique that allows the receiver to check if an email was actually sent and authorized by the owner of that domain, thus giving assurance to its authenticity.
This is done by giving the email a digital signature called the DKIM signature. The DKIM signature is an encrypted string embedded invisibly in the email which can be validated by the recipient’s email server against the public DNS records of your domain.
Usually, DKIM signatures are checked at the server level, and the results are not directly displayed to the end recipient. The email just appears in the inbox as normal, but has a better chance at passing SPAM filters and other security checks thanks to the verification process.
Once the receiving system concludes that an email is signed with a valid DKIM signature, it’s safe to say that the message of that specific email and the attachments haven’t been changed or modified.
How DKIM works in practice
How, exactly, does DKIM work to protect us in our email communications? Let's explore.
First, a public/private key pair is generated by the domain administrator. The public key is added to their Domain Name System (DNS) record, while the private key is stored internally on the sending mail transfer agent (MTA).
When an email is sent, the MTA calculates a Hash Value that represents the contents of the email and encrypts it using its private key, then adds the resulting value to the email’s header records along with the hash method used.
Upon receiving the email, the destination MTA will query the sending domain’s DNS records for the public DKIM key, then use that to decode the encrypted hash value.
Lastly, it recomputes the email’s Hash Value on its own and compares the two hashes - if they match, the receiving MTA knows that the email assuredly originated from the sending domain and has not been altered in transit.
The recipient can be confident that an email that passes DKIM verification really was sent by the domain shown.
How to test your DKIM: Let’s get technical
You can test DKIM by sending an email to a Gmail account, then opening it in the web app and clicking on the “reply” button, and selecting “show original”. In the original format, if you see “signed by along with your domain name,” then your DKIM signature is valid.
Essentially, DKIM is twofold. Either it’s working and you can verify the signature easily, or it’s not, and there is a problem. If you feel like you’re experiencing these types of errors, we have a few tips and tricks that can put an end to the problem.
To get a bit more technical, here’s one example of a DKIM signature:
“DKIM-Signature a=rsa-sha1; q=dns;
d=example.com;
i=user@eng.example.com;
s=jun2005.eng; c=relaxed/simple;
t=1117574938; x=1118006938;
h=from:to:subject:date;
b=dzdVyOfAKCdLXdJOc9G2q8LoXSlEniSb
av+yuU4zGeeruD00lszZVoG4ZHRNiYzR”
Each piece is associated with a value. Let’s break it down step by step to see how they all connect.
- b = refers to the actual digital signature of the contents (headers and body) of the message
- bh = is the body hash (not listed)
- d = the signing domain
- s = the selector
- v = the version (not listed)
- a = the signing algorithm
- c = the canonicalization algorithm(s) for header and body
- q = the default query method
- l = the length of the canonicalized part of the body that has been signed
- t = the signature timestamp
- x = the expire time
- h = the list of signed header fields, repeated for fields that occur multiple times
In the above message, however, we see that the DKIM signature is present in the last two lines and that the body hash along with the version is not listed.
We also see that:
- the signing domain which is example.com
- the selector is jun2005.eng
- the signing algorithm used to generate the signature appears to be rsa-sha1
- the method used to look up the key on the signing domain is DNS
- the signature timestamp is 1117574938 and the expiration time 1118006938 (signatures are set to expire because an already signed e-mail can be reused, creating a fake signature)
- the list of signed header fields includes the following formula: form:to:subject:date. This proves that the list has not been modified or changed whatsoever.
Advantages of DKIM
Besides the obvious assets of the DKIM system such as e-mail verification, there are also some other advantages that the user can benefit from.
1. Be more reputable
Once you’re using DKIM across all domains in your organization, you make yourself an upstanding sender in the eyes of possible partners, customers, business people, and any other third party service that you may encounter.
Signing messages with DKIM will improve your email transparency, making it significantly less likely for your email to end up in the spam folder.
When there’s an added layer of trust in your signature that the customers can easily notice, it increases the chances of them actually clicking on the links you're sending without any sense of insecurity or phishing attempts.
2. Avoid spam filters
While the DKIM system is not an anti-spam system in all senses, configuring DKIM will greatly improve your message’s chances of not being labeled as spam.
And if your emails are not reaching their end destination, that may be because the DNS record is misconfigured or you’re lacking important ones such as SPF, DKIM, or DMARC.
But don’t fret - you can always resolve this issue by simply performing a regular DNS audit to make sure everything is working properly.
3. Bypass phishing
Using DKIM authentication will help put you at ease when verifying the sender of a specific email you received.
To truly prepare yourself for the fight against phishing attacks, you should have all domains in your organization using DKIM along with SPF, as mentioned earlier.
Final thoughts on DKIM
In a nutshell, configuring DKIM is an easy and important bonus to your email security system and we strongly advise you to use it.
Security is at the core of how we operate at Proxyclick, and we make it a top responsibility to keep your information safe from external threats. (See a full list of our security measures, including more on our offering of DKIM for signing outbound emails).
And of course, don’t hesitate to contact our team of experts with any security-related questions. We’re here to help.
To learn more about Proxyclick and how we handle security, visit our security page or contact us directly below.
